If you have ever longed for a nostalgic appetizer that brings smiles to any gathering, this Classic Deviled Egg Recipe is just what you need. Simple, satisfying, and irresistibly creamy, these deviled eggs balance the perfect combination of tangy, savory, and just a hint of sweet from pickle relish. Whether you’re hosting a party or just craving a quick snack, this recipe is foolproof and endlessly delightful, showing how a few humble ingredients can turn into something extraordinary.
Ingredients You’ll Need
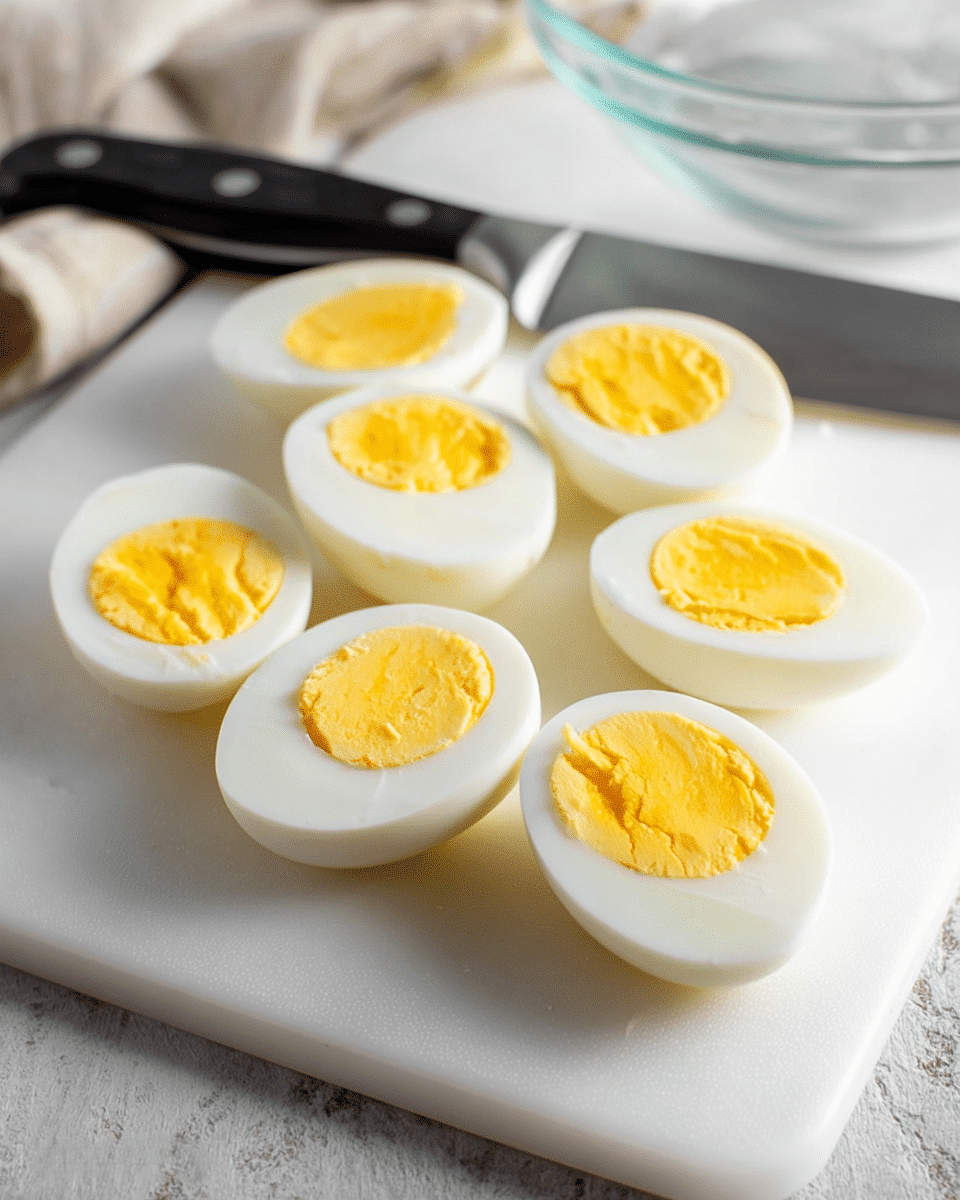
The magic of a Classic Deviled Egg Recipe lies in its straightforward, well-chosen ingredients. Each one plays an essential role, building the perfect flavor, texture, and color contrast that makes deviled eggs so memorable.
- 12 large eggs, hard boiled: The foundation of your dish, providing a smooth, creamy bite when combined with the filling.
- 1/4 cup mayo: Adds rich creaminess and a subtle tang to the yolk mixture.
- 3 tbsp sour cream: Enhances moisture with a slight tang, balancing the mayo beautifully.
- 2 tbsp pickle relish: Brings a burst of sweet and tangy crunch that livens up the filling.
- 1 1/2 tsp yellow mustard, prepared: Gives a gentle, zesty kick that brightens the overall flavors.
- Salt and pepper: Essential seasoning to elevate every bite.
- 1/2 tsp smoked paprika (or regular paprika) for garnish: Adds a pop of color and a hint of smoky warmth on top.
- 2 tbsp green onions, diced (for garnish): Fresh, mild onion flavor with vibrant green color to finish the dish elegantly.
How to Make Classic Deviled Egg Recipe
Step 1: Prepare Your Hard-Boiled Eggs
Start by hard boiling your eggs to perfection. Once cool, carefully slice each egg in half lengthwise. Gently remove the yolks, placing them into a medium bowl, and set the whites aside on a platter—it’s crucial to keep these halves intact as they’ll serve as your tasty little cups for the filling.
Step 2: Craft the Creamy Filling
In the bowl with egg yolks, add the mayo, sour cream, pickle relish, yellow mustard, salt, and pepper. Use a fork to mash and mix everything until you achieve a smooth, creamy consistency that’s easy to spoon or pipe. Don’t rush this step; the better blended the filling, the more luscious each bite will be.
Step 3: Fill and Garnish Your Deviled Eggs
Carefully spoon the yolk mixture back into each egg white half, making sure to evenly distribute the filling. For a beautiful final touch, sprinkle each deviled egg with smoked paprika for color and flavor, and scatter diced green onions over the top. These little garnishes add flair and a fresh crunch you’ll appreciate.
How to Serve Classic Deviled Egg Recipe
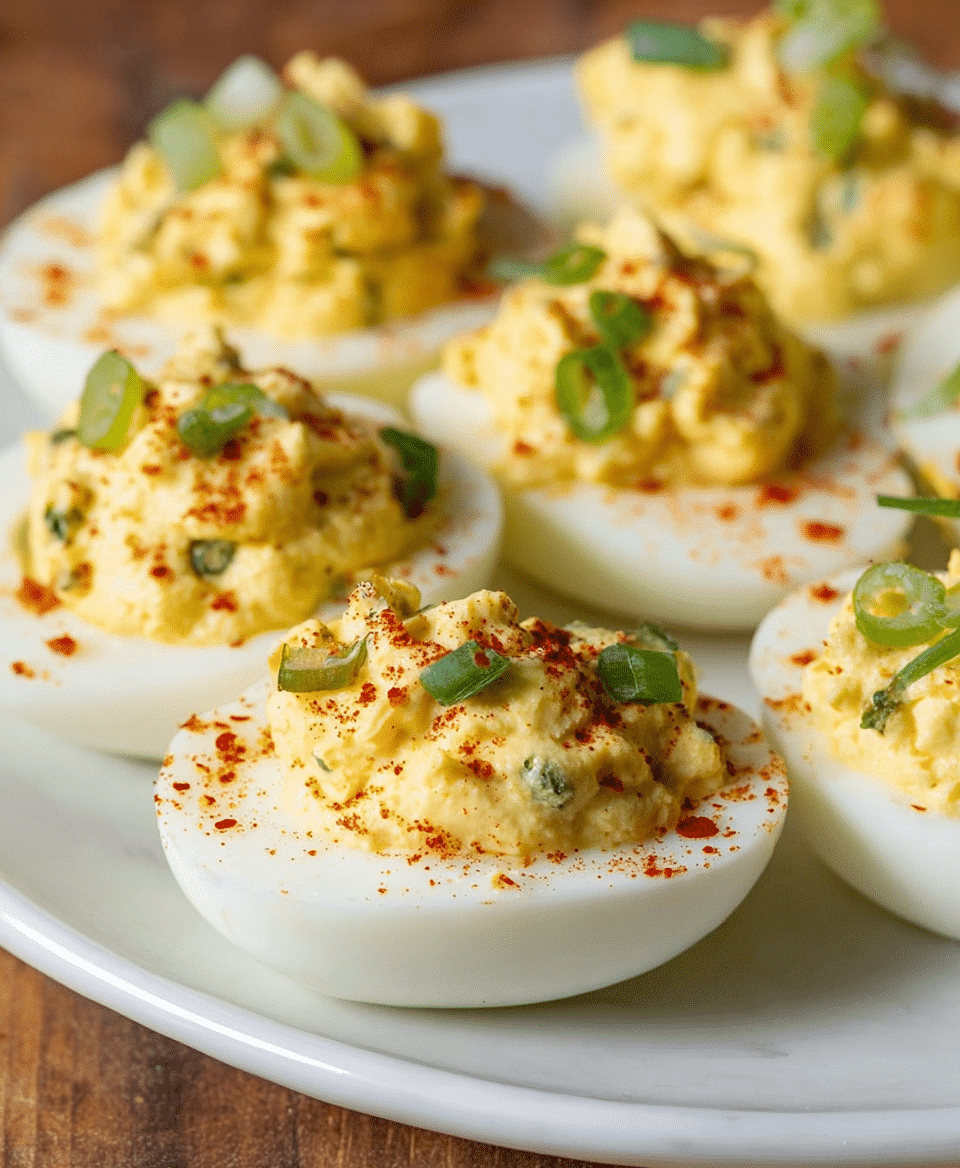
Garnishes
While paprika and green onions are classic for a reason, feel free to artistically enhance your deviled eggs with extras like crisp onions, tiny dill sprigs, or a dash of hot sauce for extra zing. These small additions offer a burst of flavor and create an inviting presentation that will draw people in at any party.
Side Dishes
Classic deviled eggs are perfect alongside a leafy green salad, a basket of freshly baked bread, or crunchy vegetable crudités. Their creamy texture and bold flavors make them fantastic companions for lighter sides that balance richness with freshness, making your appetizer spread memorable and well-rounded.
Creative Ways to Present
For an eye-catching arrangement, use a deviled egg platter or line them up on a bed of lettuce or edible flowers. You could even pipe the filling with a star tip for a decorative swirl that feels fancy but requires minimal effort. Adding themed toppers or edible glitter can elevate your presentation for special occasions, turning a classic into a showstopper.
Make Ahead and Storage
Storing Leftovers
If you find yourself with leftovers, store the deviled eggs in an airtight container in the refrigerator. It’s best to keep the filling separate and assemble just before serving to maintain the perfect texture and freshness of the egg whites. This way, they stay firm and inviting rather than becoming soggy.
Freezing
Freezing deviled eggs is not recommended because the texture of the egg whites and the creamy filling can become watery or rubbery upon thawing. It’s better to prepare fresh or make the filling ahead and keep it chilled until you’re ready to fill the eggs.
Reheating
Deviled eggs are meant to be enjoyed chilled or at room temperature, so reheating is unnecessary. Keeping them cool helps maintain that fresh taste and creamy texture which warms up poorly, so serve them straight from the fridge when possible.
FAQs
Can I use different types of mustard in this Classic Deviled Egg Recipe?
Absolutely! Yellow mustard is traditional for its mild tang, but feel free to experiment with Dijon or spicy brown mustard for a more robust flavor. Just remember to adjust the quantity to maintain balance and keep the filling smooth.
How long do deviled eggs last in the refrigerator?
When properly stored in an airtight container, deviled eggs can last up to 2 days. Beyond that, the texture and flavor may start to decline, so it’s best to enjoy them fresh whenever possible.
Can I make the filling ahead of time?
Yes, preparing the filling in advance is a great time saver. Just keep it covered and refrigerated. Fill the egg whites just before serving to ensure they remain firm and fresh-looking.
What are some ways to make deviled eggs healthier?
You can swap out some or all of the mayo for Greek yogurt to reduce fat while keeping creaminess. Additionally, consider reducing the amount of sour cream or choosing a light version to make this Classic Deviled Egg Recipe lighter without sacrificing flavor.
Can I add other flavors to the filling?
Certainly! Deviled eggs are versatile, so mixing in flavors like chopped herbs, a dash of hot sauce, chopped olives, or even a sprinkle of curry powder can add exciting twists. Just incorporate additions sparingly to let the classic flavors still shine through.
Final Thoughts
This Classic Deviled Egg Recipe is a shining example of how simple ingredients can combine into something truly delightful. Whether you’re preparing a casual snack or an elegant appetizer, these deviled eggs bring comfort and joy in every bite. I can’t wait for you to make them your own and enjoy sharing this timeless favorite with those you love!
Print
Classic Deviled Egg Recipe
- Total Time: 15 minutes
- Yield: 24 halves (12 whole eggs)
Description
This Classic Deviled Eggs Recipe features simple, fresh ingredients and is quick to prepare, making it a perfect appetizer for any occasion. The creamy yolk mixture, enhanced with mayo, sour cream, pickle relish, and mustard, is spooned into perfectly halved egg whites and garnished with smoked paprika and green onions for a delightful bite.
Ingredients
Eggs
- 12 large eggs, hard boiled
Filling
- 1/4 cup mayonnaise
- 3 tbsp sour cream
- 2 tbsp pickle relish
- 1 1/2 tsp yellow mustard, prepared
- Salt and pepper, to taste
Garnish
- 1/2 tsp smoked paprika (or regular paprika)
- 2 tbsp green onions, diced
Instructions
- Prepare the eggs: Cut the hard boiled eggs in half lengthwise and carefully remove the yolks, placing them into a medium bowl. Arrange the empty egg whites on a serving platter and set aside.
- Make the filling: To the bowl with egg yolks, add mayonnaise, sour cream, pickle relish, prepared yellow mustard, salt, and pepper. Use a fork to mash and mix the ingredients together until you achieve a smooth, creamy consistency.
- Fill the egg whites: Spoon the creamy yolk mixture into the hollowed-out egg whites evenly.
- Garnish and serve: Sprinkle the filled eggs with smoked paprika and diced green onions for an extra pop of flavor and color. Serve chilled and enjoy!
Notes
- You can prepare the filling up to a day in advance and keep it refrigerated. However, fill the egg whites just before serving for the best texture and freshness.
- Smoked paprika adds a nice smoky flavor, but regular paprika works well too.
- Adjust salt and pepper to your taste preferences.
- Leftover deviled eggs should be stored in the refrigerator and consumed within 1-2 days for optimal freshness.
- Prep Time: 15 minutes
- Cook Time: 0 minutes
- Category: Appetizer
- Method: No-Cook
- Cuisine: American

