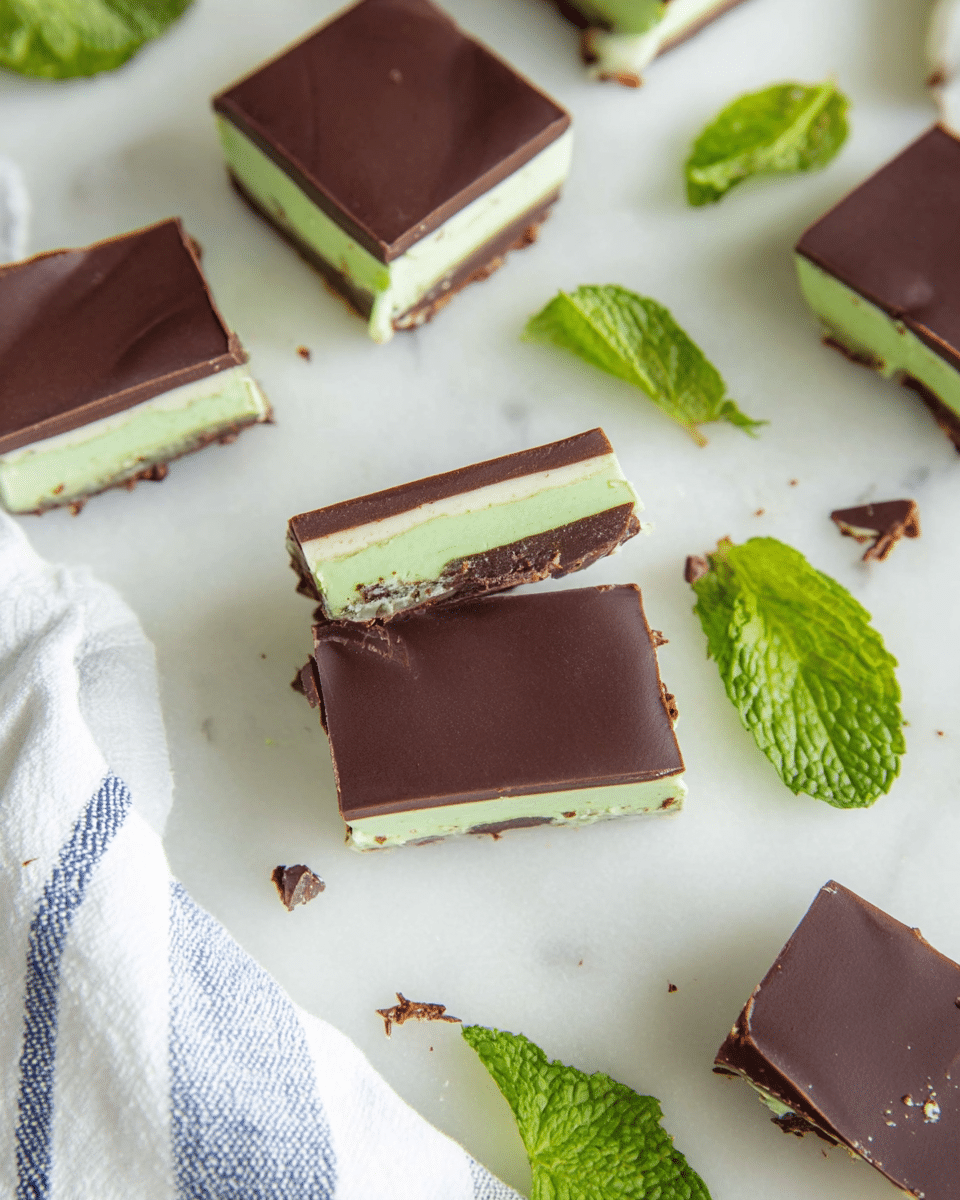
If you love that unmistakable cool mint hit wrapped in layers of smooth chocolate, you’re going to adore this Copycat Andes Mints recipe. It captures all the charm of those iconic little treats you find after dinner at a restaurant, but with the satisfaction of making them yourself right at home! This homemade version boasts silky dark and mint-infused white chocolate layers, perfectly balanced and irresistibly creamy in every bite. Once you try these Copycat Andes Mints, you’ll never want to buy the store-bought kind again.
Ingredients You’ll Need
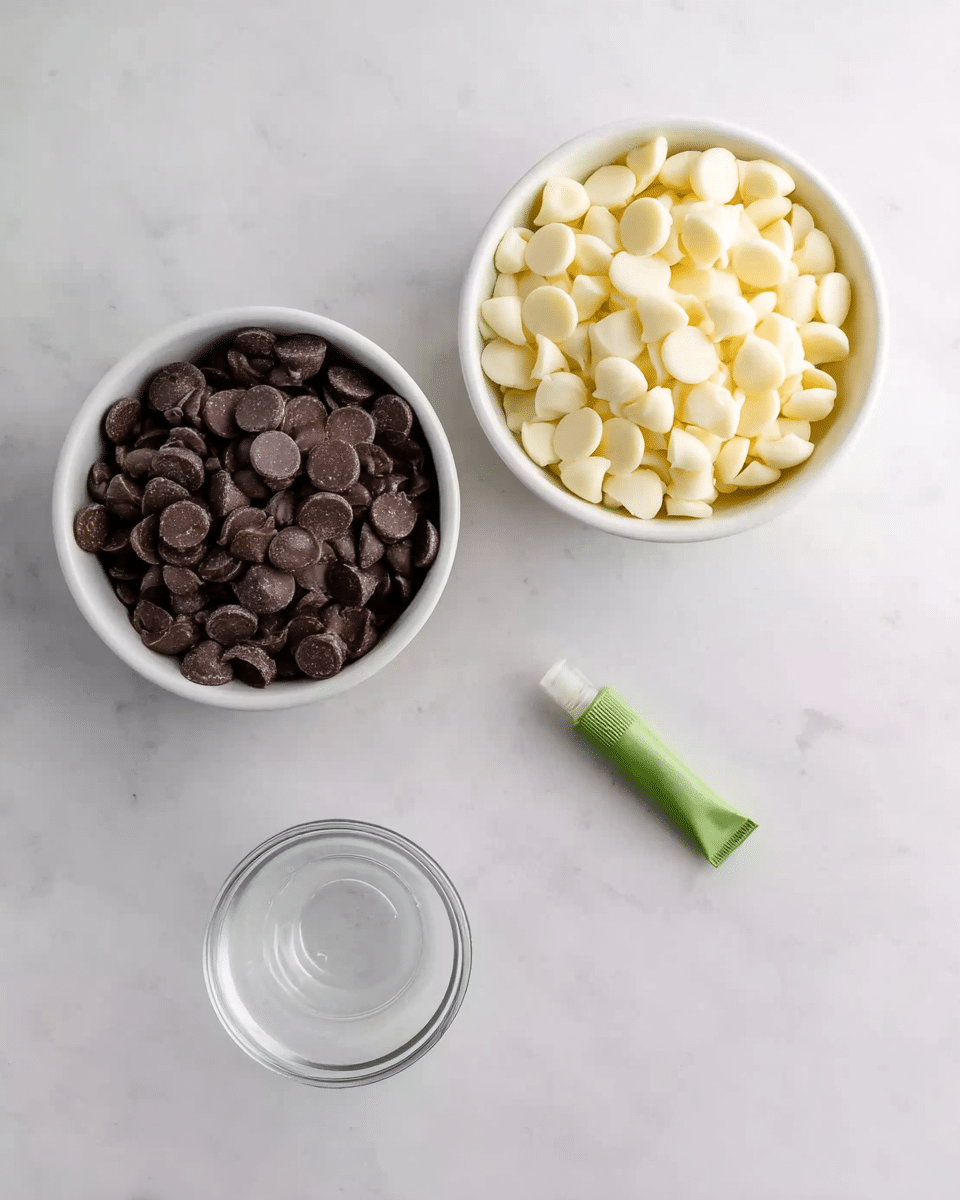
Gathering just a handful of pantry staples, this recipe leans on simplicity to create layers of pure magic. Each ingredient plays a key role in crafting the classic color contrast and that vibrant minty flavor that makes Andes Mints so beloved.
- 11 ounces dark chocolate chips: These provide the rich, slightly bitter chocolate base that balances the sweet mint layer perfectly.
- 11 ounces white chocolate chips (use about half): A creamy canvas for the mint flavor and that signature light green layer.
- 1 teaspoon peppermint extract: The essential burst of cool mint that transforms white chocolate into something truly special.
- Green gel food coloring: Adds that festive, bright green tint that makes these mints visually iconic.
How to Make Copycat Andes Mints
Step 1: Prepare the Base Layer of Dark Chocolate
Start by lining an 8×8 pan with parchment paper to make removing your mints a breeze later on. Melt half of the dark chocolate chips in a microwave-safe bowl at 50% power, stirring every 30 seconds until smooth and glossy. Pour this luscious chocolate into the pan and allow it to self-level or gently spread it to cover every inch. Pop the pan in the fridge to set while you work on the next layer.
Step 2: Create the Minty White Chocolate Layer
Next, give the white chocolate chips the same gentle melting treatment until they’re silky smooth. Stir in 1 teaspoon of peppermint extract, then add about 1 to 1.5 inches of green gel food coloring to reach that perfect minty hue. Pour this vibrant, creamy mixture over the chilled dark chocolate and spread it just enough to cover the surface. Back into the fridge it goes while you prepare the final layer.
Step 3: Add the Final Dark Chocolate Layer
Repeat the melting process with the remaining dark chocolate chips and pour this over the now set minty layer. Use a spatula to gently spread the chocolate evenly and smooth the surface for that classic three-layer look. Return the whole pan to the fridge and chill for at least 4 hours or overnight to allow the layers to solidify completely.
Step 4: Cut and Serve Your Homemade Andes Mints
Once fully chilled, lift the candy from the pan with the parchment paper. Using a sharp knife, make 5 evenly spaced horizontal cuts and 3 vertical cuts to create those perfect little mint rectangles. Serve immediately or store away for sharing with friends and family.
How to Serve Copycat Andes Mints
Garnishes
While these mints look stunning on their own, you can add a fun touch by sprinkling crushed candy canes or edible glitter on the top of the final chocolate layer before chilling. It adds a festive sparkle and extra minty crunch that’s perfect for special occasions or gift-giving.
Side Dishes
Copycat Andes Mints make a fantastic after-dinner treat alongside a hot cup of coffee or a creamy glass of milk. They also pair beautifully with simple vanilla ice cream, adding a refreshing burst of color and flavor to classic desserts.
Creative Ways to Present
For a charming gift or party favor, package your mints inside small cellophane bags tied with a ribbon or arrange them artfully on a platter with fresh mint leaves. You can even layer them in a clear jar to create a pretty display that invites everyone to grab a minty bite during gathering.
Make Ahead and Storage
Storing Leftovers
Your homemade Copycat Andes Mints will keep well in an airtight container in the refrigerator for up to two weeks. Make sure to separate layers with parchment paper to prevent them from sticking together or losing their smooth finish.
Freezing
If you want to keep a stash for longer, these mints freeze beautifully. Wrap individual pieces in plastic wrap and place them in a freezer-safe bag or container. They’ll maintain their delicious texture and flavor for up to 3 months.
Reheating
When you’re ready to enjoy frozen mints, simply let them thaw in the refrigerator for a few hours or at room temperature for about 30 minutes. Avoid microwaving, as this can alter the texture of the chocolate layers.
FAQs
Can I use different types of chocolate chips for this recipe?
Absolutely! While dark and white chocolate replicate the classic Andes layering perfectly, you can experiment with milk chocolate or even semi-sweet for a different flavor profile. Just be mindful of the sweetness balance with the mint layer.
Is peppermint extract the same as mint extract?
Peppermint extract is a type of mint extract, but it has a stronger and more distinct menthol flavor compared to spearmint or other mint varieties. For authentic Copycat Andes Mints, peppermint extract is preferred.
What if I don’t have green gel food coloring?
You can opt for liquid food coloring or omit the color entirely if you prefer a more natural look. The flavor won’t change, but the visual impact will be less striking without that vibrant green layer.
Can I make these mints nut-free?
The recipe as is contains no nuts, so it’s naturally nut-free. Just ensure the chocolate chips you purchase are processed in a nut-free facility if allergies are a concern.
How hard is it to cut the mints without breaking them?
Patience is key! Using a very sharp knife and making clean, confident cuts after the candy is fully chilled will help you avoid cracks and breaks. Wiping the knife blade clean between cuts also makes a big difference.
Final Thoughts
Making Copycat Andes Mints at home is such a rewarding little project that transforms a classic candy into something even more delightful and personal. Once you get the hang of these silky chocolate layers and that refreshing mint center, you’ll find yourself reaching for them again and again. So grab your ingredients, gather your patience, and enjoy sharing these charming homemade mints with everyone you love!
Print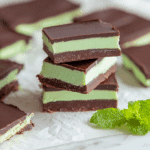
Copycat Andes Mints
- Total Time: 4 hours 35 minutes
- Yield: Approximately 24 pieces
Description
Copycat Andes Mints recreate the classic mint chocolate candy with a homemade twist. These treats feature a smooth layer of dark chocolate, a creamy minty white chocolate center tinted green, and a final dark chocolate coating. Perfect as a refreshing post-meal treat, they are easy to make with simple ingredients and require chilling for a firm texture.
Ingredients
Dark Chocolate Layer
- 11 ounces dark chocolate chips
Mint Layer
- About half of 11 ounces white chocolate chips
- 1 teaspoon peppermint extract
- 1–1.5 inches green gel food coloring
Additional
- Parchment paper for an 8×8 inch pan
Instructions
- Prepare the Pan: Line an 8×8 inch baking pan with parchment paper, ensuring it covers the sides to easily lift out the candy after chilling.
- Melt the First Dark Chocolate Layer: Place half of the dark chocolate chips in a large microwave-safe bowl. Microwave on 50% power for 1 minute, then stir. Continue microwaving in 30-second intervals at 50% power, stirring after each, until the chocolate is fully melted and silky smooth. Pour this melted chocolate into the prepared pan, spreading it evenly or gently shaking the pan to self-level the chocolate. Refrigerate while preparing the next layer.
- Melt the White Chocolate and Add Mint Flavor: Melt about half of the white chocolate chips using the same microwave method as above until silky smooth. Stir in 1 teaspoon peppermint extract and 1 to 1.5 inches of green gel food coloring until the mixture is uniformly light green.
- Pour the Mint Layer: Carefully pour the green white chocolate mixture over the chilled dark chocolate layer, spreading just enough to cover the surface evenly. Return the pan to the refrigerator.
- Melt the Remaining Dark Chocolate: Repeat the melting process for the remaining dark chocolate chips until smooth.
- Add the Final Dark Chocolate Layer: Pour the remaining melted dark chocolate over the green mint layer. Gently spread the chocolate to create a flat and even top layer. Refrigerate the whole pan for at least 4 hours or overnight to allow the candy to set firmly.
- Slice and Serve: After chilling, lift the candy from the pan using the parchment paper. Using a clean, sharp knife, make 5 cuts across the candy and 3 cuts in the opposite direction to create individual pieces. Serve immediately or store in an airtight container.
Notes
- Use parchment paper to prevent the chocolate from sticking and make removal easier.
- Microwave melting is done at 50% power to prevent burning the chocolate.
- Be gentle while spreading layers to maintain distinct layers without mixing them.
- Chilling time is essential for the chocolate layers to firm up properly.
- Clean your knife between cuts for neat slices.
- Prep Time: 30 minutes
- Cook Time: 5 minutes
- Category: Dessert
- Method: No-Cook
- Cuisine: American


