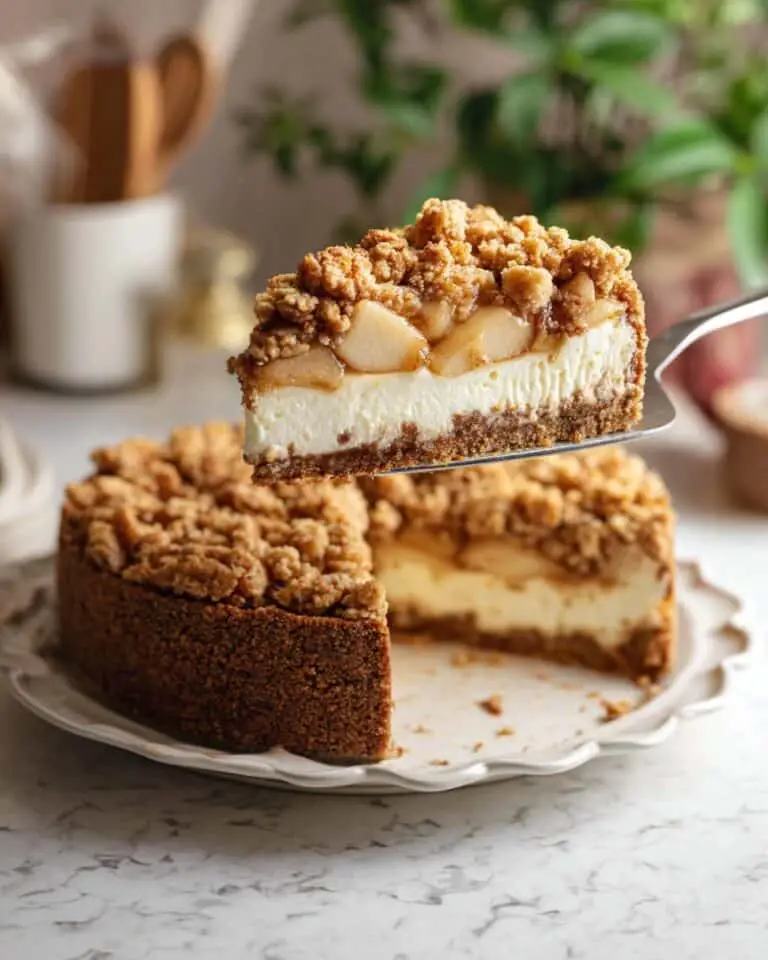
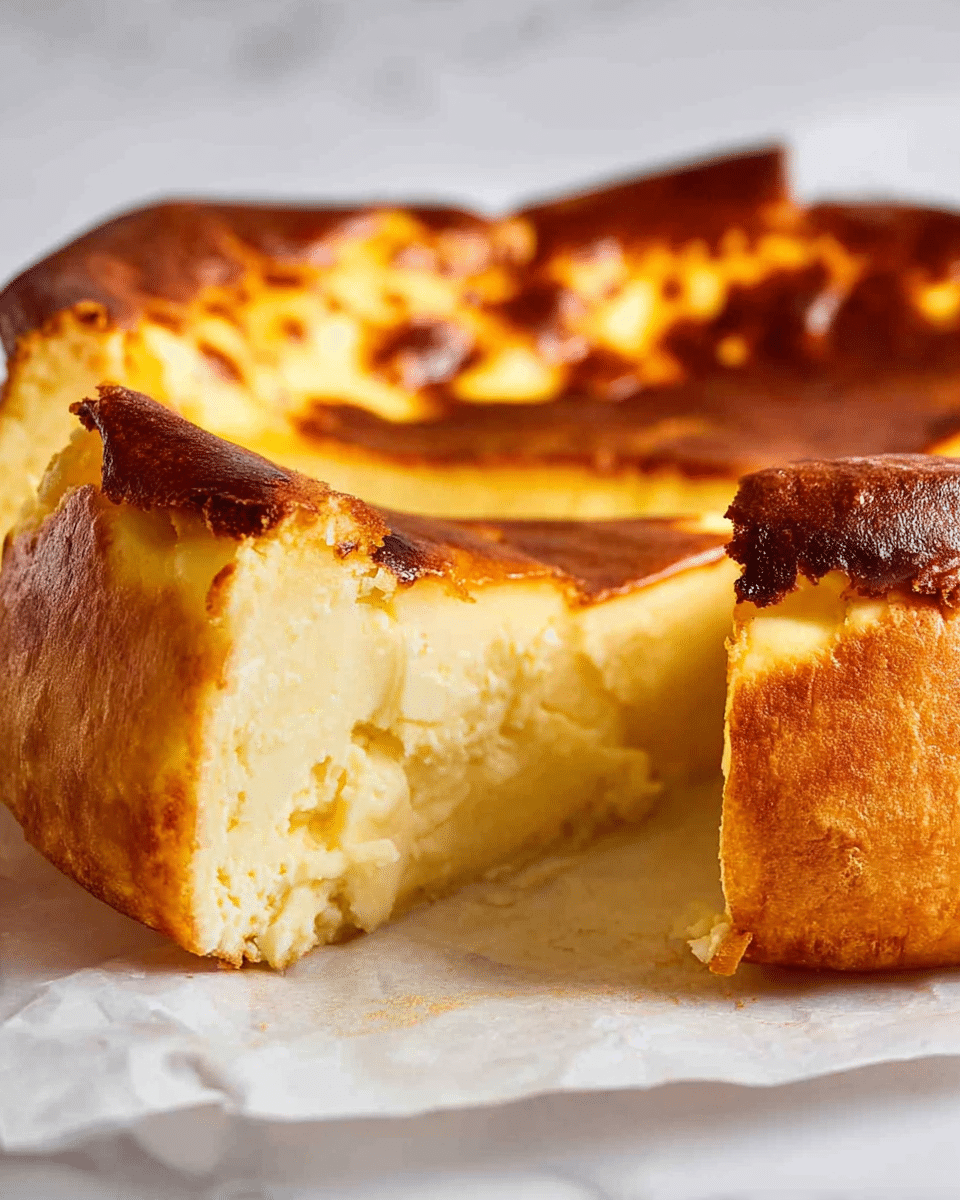
If you are searching for a truly unforgettable dessert to wow your friends or treat yourself, this Burnt Basque Cheesecake Recipe is exactly what you need. Rustic beauty with a deeply caramelized, golden-brown top meets a light yet luxuriously creamy interior in this iconic Basque country classic. Unlike traditional cheesecakes, which can sometimes feel dense or too sweet, this cheesecake strikes the perfect balance with its velvety texture and subtly sweet flavor, baked high and hot to achieve its signature slightly burnt surface that adds a delicious smoky edge. Get ready to fall in love with a cheesecake that feels both indulgent and remarkably airy at the same time.
Ingredients You’ll Need
Don’t let the simplicity of these ingredients fool you — each one plays an essential role in crafting the perfect texture, flavor, and that unmistakable golden crust. From the rich cream cheese to the light whipping cream, everything combines harmoniously for this iconic cheesecake.
- Cream cheese (750 g): The backbone of the cheesecake’s creamy richness, best at room temperature for smooth mixing.
- Caster sugar (1 cup): Provides just the right sweetness without overpowering, dissolves easily for a silky batter.
- Whipping cream (1 1/4 cups): Adds luscious creaminess and tenderness, taken out slightly early to blend seamlessly.
- Plain/all-purpose flour (1/4 cup): Just enough to give structure without weighing down the cake.
- Vanilla bean extract or paste (1 tsp): Elevates the flavor with warm, aromatic notes.
- Eggs (3/4 cups + 1 tbsp lightly whisked): The key to creating that fluffy, souffle-like texture when measured and incorporated carefully.
How to Make Burnt Basque Cheesecake Recipe
Step 1: Preheat and Prepare Your Pan
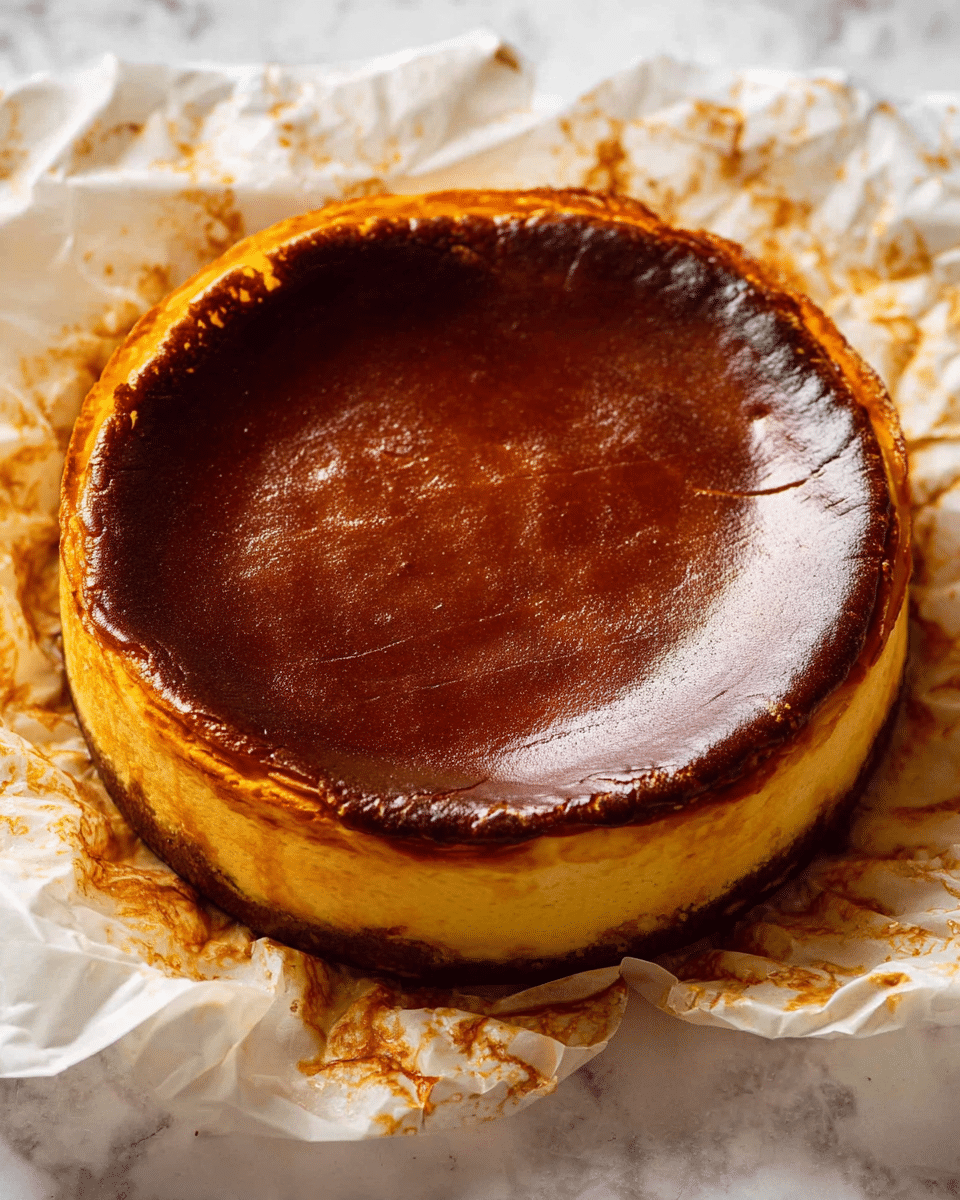
Begin by preheating your oven to 220°C (425°F), preferably with the shelf positioned in the middle for even baking. Next, press scrunched parchment paper sheets into a 20cm springform pan, allowing the paper to fold over the edges. This rustic liner creates the signature charming ridges along the sides and ensures your cheesecake doesn’t stick, giving that perfect burnt edge texture.
Step 2: Beat the Cream Cheese and Sugar
Using a handheld mixer or stand mixer with a paddle attachment, beat the cream cheese on medium speed for 2 minutes until it’s flawlessly smooth and lump-free. Then add the caster sugar and mix on low speed briefly just to incorporate the sugar without adding excess air. This step ensures a dense yet creamy base for your cheesecake filling.
Step 3: Make the Cream and Flour Mixture
In a separate bowl, whisk together about one quarter of the cream with the flour until you get a smooth, paste-like consistency. Then gradually add the remaining cream and the vanilla bean extract while whisking to avoid any lumps. This flour-cream paste is a clever trick to build a tender structure without heaviness, making your cheesecake fluffier.
Step 4: Combine Wet Ingredients Carefully
With the mixer on low speed, slowly pour the cream mixture into the cream cheese bowl, mixing gently to prevent overbeat air bubbles. Then add the lightly whisked eggs little by little, just until combined. Stopping as soon as the eggs blend in helps maintain a smooth texture and prevents over-aeration that could cause cracks or uneven baking.
Step 5: Pour, Pop Bubbles, and Bake
Pour the batter into the prepared pan and firmly bang the pan on the counter a few times to release any trapped air bubbles. Use a small knife to pop visible bubbles on the surface multiple times. Now bake for approximately 45 minutes, or until the top turns a deep golden brown—up to 65 minutes depending on your oven. The cheesecake will puff up like a delicate soufflé and the top will develop that all-important burnt look with caramelized flavor.
Step 6: Cool and Chill
After baking, let the cheesecake cool at room temperature for at least 2 hours; it will sink and flatten naturally. Then refrigerate uncovered for a minimum of 8 hours, allowing the cheesecake to set completely and the flavors to deepen. This chilling step is critical to achieve the perfect creamy texture and to make slicing effortless.
How to Serve Burnt Basque Cheesecake Recipe
Garnishes
This burnt Basque cheesecake is so rich and flavorful it truly does not need much in the way of adornment. A simple dusting of powdered sugar or a few fresh berries can brighten the plate, but trust me, the cake alone is stunning and delicious — its rustic burnt edges are a visual and flavorful star all on their own.
Side Dishes
If you want to add a little extra flair, consider serving alongside tangy fruit compotes like cherry or raspberry, which cut through the richness with fresh acidity. A small scoop of vanilla bean ice cream or a dollop of lightly whipped cream pairs beautifully, but even a cup of strong coffee or tea is the perfect companion for this luscious dessert.
Creative Ways to Present
One of my favorite ways to serve this Burnt Basque Cheesecake Recipe is right on the parchment paper it baked on, emphasizing its rustic charm and silky texture. Slice it up with a sharp knife for clean edges, and consider offering a small palette knife for guests to enjoy a piece of the signature crinkly, browned crust alongside creamy interior. It makes for a relaxed, crowd-pleasing centerpiece whenever you serve it.
Make Ahead and Storage
Storing Leftovers
Leftover cheesecake will keep very well in the fridge for up to 5 days. In fact, the flavors continue to deepen, making day two or three slices even more delicious as the texture fully sets. Just cover loosely or store in an airtight container to avoid absorbing other fridge odors.
Freezing
This cheesecake is best enjoyed fresh or refrigerated; freezing is not recommended as it can alter the delicate texture and creaminess. So plan to consume it within a few days for the best experience of this exquisite dessert.
Reheating
If you prefer to serve your burnt Basque cheesecake at room temperature, simply let it sit out for about 30 minutes before slicing. Avoid microwaving or warming it, as that can ruin the smooth, creamy texture you worked so hard to achieve.
FAQs
What makes a Burnt Basque Cheesecake different from regular cheesecake?
The defining feature is its deeply caramelized, almost burnt top and edges, created by baking at a higher temperature than traditional cheesecakes. This gives the cake a smoky, caramel flavor and a rustic appearance, while the interior remains soft, light, and creamy.
Can I use low-fat cream cheese or cream for this recipe?
Low-fat versions won’t work well here since the full-fat ingredients provide the richness and creamy texture essential to the cheesecake’s signature luxuriously smooth and fluffy interior.
Why is the baking temperature so high for Burnt Basque Cheesecake Recipe?
High heat accelerates caramelization and browning of the top, creating that characteristic burnt surface which adds complex flavor and texture contrasts. It also allows the cake to puff up like a soufflé while baking.
How do I know when the cheesecake is done baking?
Look for a deeply golden brown top and edges. The center will still be jiggly and soft to the touch—that’s exactly what you want. The cheesecake will set as it cools, so avoid overbaking which can dry it out.
Can I make this cheesecake without a springform pan?
Yes! Using a regular 20cm cake pan lined generously with parchment paper is fine. Just make sure you have enough paper overhang to lift the cheesecake out easily once cooled.
Final Thoughts
If you haven’t tried making the Burnt Basque Cheesecake Recipe yet, what are you waiting for? Its perfect harmony of a caramelized, smoky crust and the exquisitely fluffy, creamy inside will quickly make it a favorite in your baking repertoire—and probably a crowd-pleaser at every gathering. Trust me, once you get this recipe right, you’ll be coming back to it again and again for irresistible desserts that feel like home.
Print
Burnt Basque Cheesecake Recipe
- Total Time: 9 hours (including chilling)
- Yield: 12 servings
Description
This iconic Burnt Basque Cheesecake is known for its rustic perfection featuring a signature golden burnt surface that caramelizes beautifully, paired with a light and airy creamy vanilla cheesecake interior. Baked at a higher temperature than classic cheesecakes to achieve a fluffy texture without the usual dry overcooked edges, this luscious yet lightly sweet dessert is perfect for cheesecake lovers seeking a truly authentic Basque experience.
Ingredients
Cheesecake Ingredients
- 750 g / 1.5 lb cream cheese blocks, room temperature (Philadelphia recommended)
- 1 cup caster / superfine sugar (regular white sugar also works)
- 1 1/4 cups whipping cream, slightly de-chilled (take out of fridge 15 minutes prior)
- 1/4 cup plain/all-purpose flour
- 1 tsp vanilla bean extract or paste
- 3/4 cup + 1 tbsp lightly whisked eggs, at room temperature (~4–5 large eggs, measure weight around 220g)
Instructions
- Preheat Oven and Prepare Pan: Preheat your oven to 220°C/425°F (200°C fan) with the oven rack in the middle. Prepare a 20cm/8″ springform pan by pressing two sheets of scrunched parchment paper (about 40cm/16″ each) arranged in an “X” shape into the pan, folding the paper over the rim to hold in place. This creates the cheesecake’s signature rustic sides and prevents overbrowning.
- Beat Cream Cheese and Sugar: In a large bowl, beat the room temperature cream cheese on medium speed for 2 minutes until smooth and lump-free. Add the sugar and beat on low speed for 10 seconds until combined.
- Mix Flour and Cream: In a separate medium bowl, combine about 1/4 cup of the whipping cream with the flour. Whisk by hand until lump-free and paste-like. Gradually whisk in the remaining cream and then add the vanilla extract, mixing until smooth and pourable (not whipped).
- Combine Cream Mixture with Cream Cheese: With the mixer on low speed, slowly pour the cream and flour mixture into the cream cheese mixture. Beat just until combined to avoid incorporating air bubbles.
- Add Eggs: Continue beating on low speed and slowly pour in the lightly whisked eggs until just incorporated. Immediately stop beating to minimize air bubbles in the batter.
- Pour and Remove Air Bubbles: Pour the batter into the prepared pan. Gently bang the pan on your counter to even out the batter. Pop any visible air bubbles on the surface with a small sharp knife, repeating this 3 to 5 times to ensure a smooth surface.
- Bake the Cheesecake: Bake for 45 minutes or until the surface is a deep golden brown. Some ovens may require up to 65 minutes; watch closely during the last 15 minutes to avoid burning. The cheesecake will rise like a soufflé and the center should still be slightly wobbly.
- Cool and Chill: Remove from oven and cool the cheesecake in the pan on the counter for at least 2 hours. The cheesecake will sink slightly, which is normal. Then refrigerate uncovered for at least 8 hours or overnight to set properly.
- Serve: Carefully release the springform pan sides. Use the parchment paper overhang to lift the cheesecake out onto a board or plate. Fold down the parchment sides for a rustic presentation. Serve chilled or bring to room temperature for about 30 minutes before slicing and enjoying. No additional toppings needed.
Notes
- Use full-fat cream cheese; low-fat versions won’t set properly.
- Ensure the whipping cream is suitable for whipping and not low-fat.
- Accurate measurement of eggs by weight (~220g) is important for proper texture.
- Scrunched parchment paper creates texture and prevents side overcooking; do not grease the pan.
- Use low to medium mixer speeds to avoid excess air incorporation for a smoother cheesecake texture.
- Mix cream and flour carefully in stages to prevent lumps.
- Air bubbles will cause browned lumps on the surface, but only affect appearance, not taste.
- Baking time varies by oven; judge doneness by deep golden color of the surface, center will still be wobbly.
- Leftovers keep well refrigerated for up to 5 days, flavor improves with time; not suitable for freezing.
- Prep Time: 15 minutes
- Cook Time: 45 minutes
- Category: Dessert
- Method: Baking
- Cuisine: Basque Country, Spain

